Tutorial: How to Make Flappy Bird in Unity3D
Feb 23, 2014
Yes, using a 3D game engine for a 2D game.
This is a tutorial that will teach you how to make a clone of Flappy Bird called Tappy Plane using Unity3D. You should use this tutorial if you’re a beginner to Unity 2D game development with some C# programming experience. Let’s get started!
The complete project code can be found on Github
All images used under Creative Commons from Kenney Vleugels
Install Unity
Unity3D is a free game development engine. Although Unity3D has “3D” in it, its most recent version supports the creation of 2D games. When you create a game on Unity, it can be run on iOS, Android, Windows Phone, the Web, and many other platforms.

Create a new project
When you open up Unity, this should be the first window you see.
Go to the Create New Project tab and select the folder to put it in. The name can be changed later. Change the setup defaults for at the bottom to be 2D. Then press the Create button.
Organize your project
After creating the project, you should be greeted with this blank screen.
Navigate over to the Project window at the bottom to create the folder structure you need to organize your files. Add four folders called “Prefabs”, “Scenes”, “Scripts”, and “Textures”.
Here’s an explanation for what type of file each folder holds.
Prefabs
In Unity, a Prefab is an object that can be reused and created such as bullets, enemies, or walls.
Scenes
A scene is like a level of a game.
Scripts
This folder will hold all the code.
Textures
All the images used in the game. In 2D gaming, these images are called “Sprites”.
Set up the background
Save this image to the Textures folder you created.

Drag the image into the center main Scene area. Using the inspector, set the scale to be 2.5 in both the X and Y fields.
Add the player
Save this image to the Textures folder. Drag and drop it into the scene just as you did with the background.

Set the value of Z in the right side bar under Transform to -1. This ensures that the player will always be in the front.
In the inspector, click Add Component, type “Rigidbody 2D”, and press enter. A Rigidbody component gives the airplane gravity and other physics characteristics.
Press the triangle Play button at the top of the screen. You should see the plane falling as it adheres to gravity.
Controlling the Player
Now we’re going to create a script that allows the player to move. Inside the Scripts folder, create a C# file called Player.cs. Fill the contents with this code:
using UnityEngine;

public class Player : MonoBehaviour
{
	// The force which is added when the player jumps

	// This can be changed in the Inspector window

	public Vector2 jumpForce = new Vector2(0, 300);

	// Update is called once per frame

	void Update ()
	{
		// Jump

		if (Input.GetKeyUp("space"))
		{
			rigidbody2D.velocity = Vector2.zero;
			rigidbody2D.AddForce(jumpForce);
		}
	}
}
There are two main parts in this code: the jumpForce variable and the Update method.
jumpForcestores the force applied to the player when we jump.- It is of the
Vector2type, meaning that it stores two values:xandy. - Because this variable is public, you can change its value in the Inspector.
- It is of the
- The
Updatemethod is a function that is called every frame of the game. In it, if the spacebar button is pressed, a force is added to the rigidbody.
Add this script to the Player object the same way you added the RigidBody 2D, with the Add Component button. Now when you press Play, you’ll be able to jump up and fall back down.
Creating the obstacles
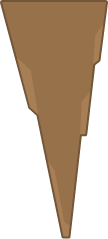
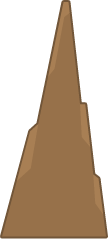
Drag these two images in and once again, save them into the Textures folder. Drag these images onto the Scene and in the Inspector, change their X and Y scales to be 2.5.
Position these objects so that they are above each other, to the right of the background, and wide enough apart that the player can jump through them.
In the file menu, go to GameObject->Create Empty. This will add an object to the scene that is invisible and will serve as a folder that holds our rock obstacles. Name it “RockPair”. Drag the two rock GameObjects onto the RockPair object.
Moving the obstacles
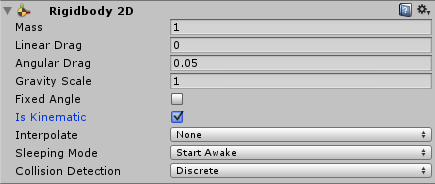
Add a “RigidBody 2D” component to the RockPair parent object. In the inspector, check Is Kinematic. This prevents the obstacles from being affected by gravity.
Create another script called Obstacle.cs and place it in the Scripts folder. This script will be used to move the rocks from the right of the screen to the left. Fill this file with this code:
using UnityEngine;

public class Obstacle : MonoBehaviour
{
	public Vector2 velocity = new Vector2(-4, 0);

	// Use this for initialization

	void Start()
	{
		rigidbody2D.velocity = velocity;
	}
}
The Start method runs once, when the GameObject is created. In this case, we are setting the object’s velocity to be -4 in the x direction.
Add this script to the RockPair GameObject and hit the Play button. You should see the obstacles move across the screen.
Generating obstacles
We need to create new rock obstacles every few seconds. To begin, drag the RockPair Object into the Prefabs folder. This turns RockPair into a Prefab, which is an object that can be created and destroyed many times. Delete the RockPair object that is in the scene.
Create another Empty GameObject and rename it to “Scripts”. Create another Script called Generate.cs. Paste this code into it and add the Generate script to the Scripts empty GameObject.
using UnityEngine;

public class Generate : MonoBehaviour
{
	public GameObject rocks;

	// Use this for initialization

	void Start()
	{
		InvokeRepeating("CreateObstacle", 1f, 1.5f);
	}

	void CreateObstacle()
	{
		Instantiate(rocks);
	}
}
In this script, we use the InvokeRepeating method. This will call a specific function once every several seconds. The first parameter is a string with the name of the method to call. The second is the number of seconds to delay these repeated calls. And the third parameter is the number of seconds between method calls.
In the CreateObstacle method, we use Instantiate, a method that will generate a new prefab to the scene. And the prefab that we add to the scene is a variable called rocks. This variable isn’t linked to our RockPair prefab yet though. To do this, drag the RockPair prefab from its folder into the empty field that says rocks in the Inspector. Follow this video:
Try running the code. You should see obstacles being generated every 1.5 seconds!
Killing the Player
You may have noticed that running into the obstacles doesn’t do anything. Let’s make something happen because of this collision.
Click on the player GameObject. Add a component called “Box Collider 2D”.
Now go to the RockPair prefab and click on the small arrow. Select the first object and add a component called “Polygon Collider 2D”. Do the same for the other Obstacle.
A Collider component is a shape that triggers collisions to happen. Play the game and see what happens. It’s a really interesting thing to watch.
When the player collides with the obstacle, let’s make the game restart. We’re going to edit the Player.cs file to do this. Open the file up and edit it to look like this:
using UnityEngine;

public class Player : MonoBehaviour
{
	// The force which is added when the player jumps

	// This can be changed in the Inspector window

	public Vector2 jumpForce = new Vector2(0, 300);

	// Update is called once per frame

	void Update ()
	{
		// Jump

		if (Input.GetKeyUp("space"))
		{
			rigidbody2D.velocity = Vector2.zero;
			rigidbody2D.AddForce(jumpForce);
		}

		// Die by being off screen

		Vector2 screenPosition = Camera.main.WorldToScreenPoint(transform.position);
		if (screenPosition.y > Screen.height || screenPosition.y < 0)
		{
			Die();
		}
	}

	// Die by collision

	void OnCollisionEnter2D(Collision2D other)
	{
		Die();
	}

	void Die()
	{
		Application.LoadLevel(Application.loadedLevel);
	}
}- Inside the
Updatemethod, we’ve added some lines of code that check if the player’s position is inside the screen or not. If it’s not, the player will die.transformholds the position, rotation, and scale of whatever GameObject the script is attached to.
- The
Diemethod will cause the level to reset. - The
OnCollisionEnter2Dmethod is called whenever there is a collision detected between two GameObjects that have Collider 2D components.
Run the game. The game should restart every time the player crashes or goes off screen.
Add a touch of randomness
If you try to play the game now, it can be a little… boring. We need to vary the height of the rocks to make it more challenging. Update your Obstacle.cs file.
using UnityEngine;

public class Obstacle : MonoBehaviour
{
	public Vector2 velocity = new Vector2(-4, 0);
	public float range = 4;

	// Use this for initialization

	void Start()
	{
		rigidbody2D.velocity = velocity;
		transform.position = new Vector3(transform.position.x, transform.position.y - range * Random.value, transform.position.z);
	}
}- The
rangevariable is a range of randomness. The higher this number is, the greater the variation the rocks will be. You may need to adjust this value to fit your game. - When the object is first created, we move its position down a random amount.
Keeping score
Finally, let’s keep score. Update the Generate.cs file to look like this:
using UnityEngine;

public class Generate : MonoBehaviour
{
	public GameObject rocks;
	int score = 0;

	// Use this for initialization

	void Start()
	{
		InvokeRepeating("CreateObstacle", 1f, 1.5f);
	}

	// Update is called once per frame

	void OnGUI ()
	{
		GUI.color = Color.black;
		GUILayout.Label(" Score: " + score.ToString());
	}

	void CreateObstacle()
	{
		Instantiate(rocks);
		score++;
	}
}- We now have an integer used to keep the
score - The
OnGUImethod is called several times a frame and is used for displaying text and buttons. Here we display the score in the top left of the screen in black text. - Every time a new obstacle is created, a point is added.
Save your work
Go to File->Save and save this level into the Scenes folder, named Play.unity. Breathe a sigh of contentment.
That’s all folks!
Congratulations! You’ve made a Flappy Bird clone in Unity. Feel free to change this game and work on your own ideas and art. Here are a couple ideas on things to change:
- Right now, we create new obstacles, but never destroy them. After a while of running, the game could slow down a lot.
- There is no proper menu or play screen.
Thanks for reading! If you enjoyed this please share, and if you have any questions, feel free to ask me.
Share